
Assign saved item and location references to a scene
Select existing prop and location references for one scene, wait for them to save, and confirm the choices survive a reload. Includes real screenshots, zero observed credit deduction and mobile layout limits.
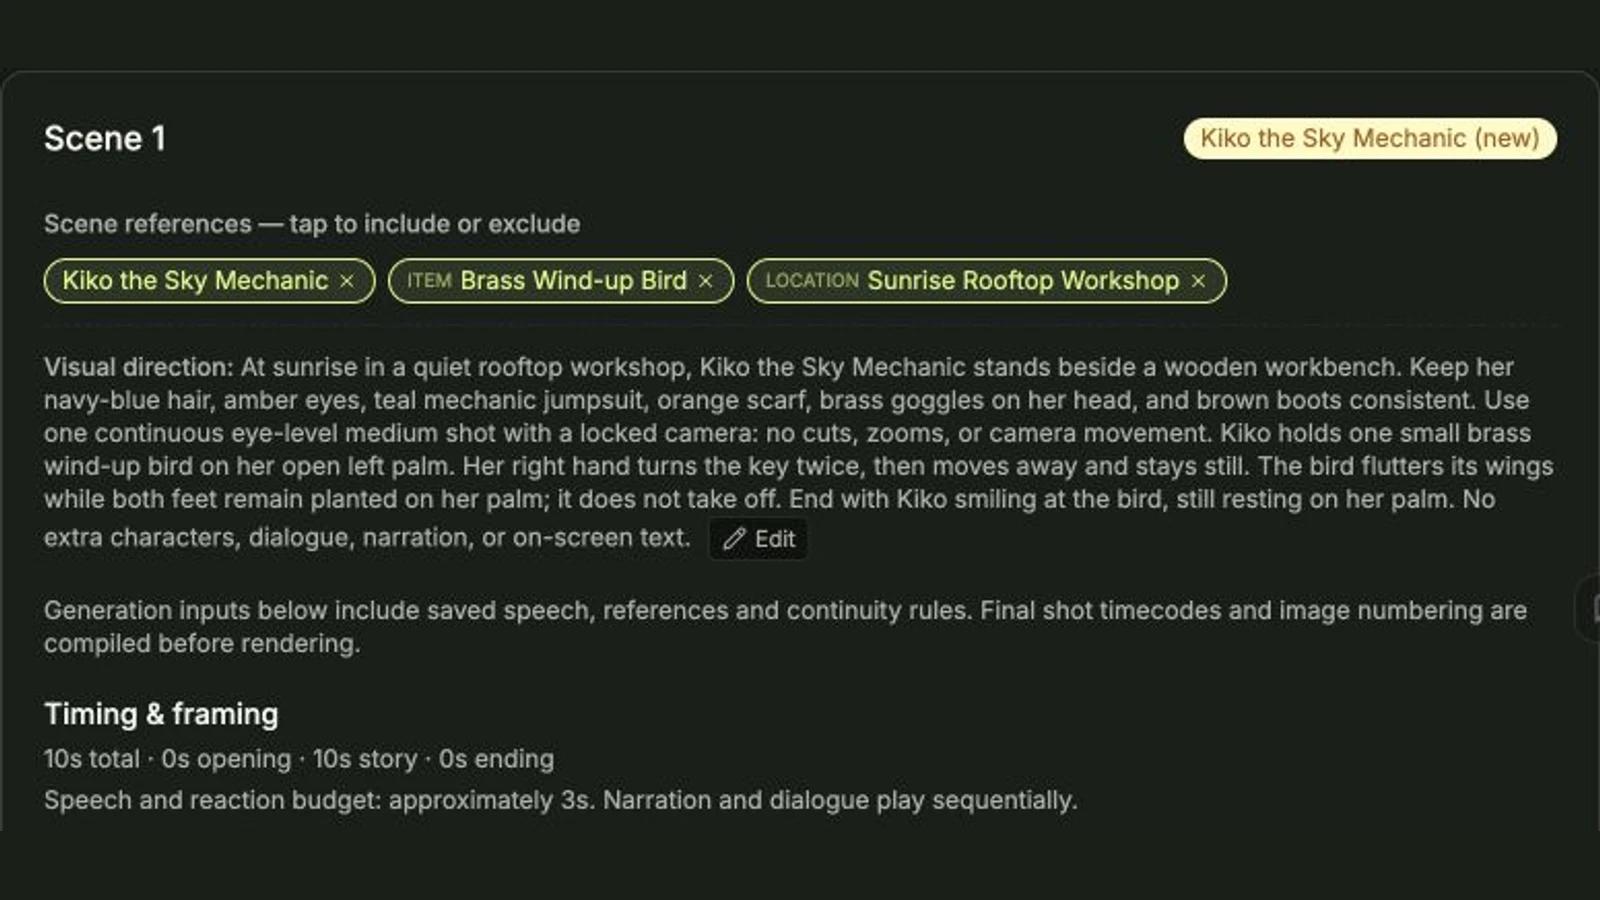
A saved prop or location can exist in your project without being selected for a particular scene. This walkthrough adds two existing references to Scene 1, then reloads the project to check that the choices were saved.
This is a scene-settings tutorial. We did not generate an image, render a clip or stitch a video in this run, so the screenshots do not prove a change to rendered output.
Before you begin
Sign in and open Create. Use Show story history to reopen your own project, then open Scenes → Prompts.
Our prerequisite project was Kiko and the Brass Bird, with one existing scene and three previously saved assets: Kiko the Sky Mechanic, Brass Wind-up Bird (Item), and Sunrise Rooftop Workshop (Location). All three assets and the video thumbnail visible in these screenshots predate this tutorial. We did not create them again.
The reference settings are private to the signed-in editor. There is no public settings page for readers to inspect; the public screenshots below document the actual saved state.
Step 1 — Inspect the references selected for your scene

In Scenes, choose the scene and open Prompts. Find Scene references — tap to include or exclude. In this run Kiko was already selected. The bird and rooftop chips showed +, indicating they were available to add.
Check the asset names before tapping. We kept Kiko selected throughout. If the workspace is cramped, use its draggable divider to give the scene panel more room.
Step 2 — Include the existing item

Click item Brass Wind-up Bird + once. Its chip becomes highlighted and shows a remove mark instead of the plus. The location remains unselected in this intermediate screenshot.
There was no prompt to type and no model, aspect-ratio or duration choice for this operation. The render controls elsewhere in the workspace were not used.
Step 3 — Include the location and verify persistence

Click location Sunrise Rooftop Workshop + once. The chip briefly disabled while the change saved; we waited for it to become enabled again. There was no separate Save button for these chips.
Then reload the whole page, reopen Scenes → Prompts, and inspect the same scene. All three highlighted chips remained selected in our test. This reload check is the evidence that the settings persisted, rather than just changing temporarily on screen.
The exact actions were:
- Include Brass Wind-up Bird.
- Include Sunrise Rooftop Workshop.
- Leave Kiko the Sky Mechanic selected.
- Wait for the controls to finish saving, reload, and reopen the same panel.
Step 4 — Review the saved input summary

Below the visual direction, the input summary displayed Setting: Sunrise Rooftop Workshop under Continuity. The character appearance and wardrobe section still described Kiko. The scene navigator continued to display one character; we do not interpret that count as a count of every selected prop and location.
One existing inconsistency remains visible: the older visual-direction text says orange scarf, while the saved character wardrobe says crimson-red scarf. Selecting references did not rewrite that text. Reconcile contradictory directions before a future render. This tutorial does not claim that reference selection resolves those instructions or that the old clip uses the newly selected assets.
Step 5 — Find the saved choices at a narrow width

We also inspected the saved settings at an actual 390 × 844 browser viewport. A remembered desktop panel width initially clipped the workspace. Double-clicking the divider reset the panel; switching Story → Prompts then showed the same three selected chips.
The left chat stayed cramped, and the upper workspace navigation became icon-only without accessible button names in our inspection. These are limitations of this tested layout. We verified the saved references on mobile width, but did not submit new reference changes from mobile or test a physical phone.
Result and cost
Completed: one scene now has the existing item and location selected alongside its existing character; both additions survived a full reload. Desktop verification used 1440 × 1000. The balance read 824 credits before and 824 after, an observed deduction of 0 credits for this run.
Not tested: generated visual effects, image-reference numbering in a rendered request, a new video, audio, or synchronization to a separate Character Library. The displayed 10-second scene timing belongs to the previous scene plan; no new duration was produced here.
To find your saved settings later, return to Create, sign in, reopen your project through story history and choose Scenes → Prompts. Review the selected chips before you decide to render.
A first like from an active subscriber gives a community author 1 credit. Likes are permanent; self-likes and repeat rewards are excluded.